Categories
Bars Cakes Chocolate Cheer Classic Favorites Cookies

Sad Shibow Turns One! Let’s Celebrate By Failing Spectacularly At Something, And Then Celebrate More By Gorging Ourselves On Cake

Baby Fat Shibow's First Birthday

This picture’s from my first birthday. I’d never seen it before last night, and after viewing it I promptly burst into tears. Don’t ask me why. It’s been a weird year so far.

Wow. Just…wow. We actually made it. Can I be honest with ya’ll? When I started this blog one year ago today, I was in a crummy (or crumby, get it? Get it? Nyuk nyuk, I’m clever) place. I was physically and emotionally injured man, and I mostly began writing this thing because it distracted me from the hurt back and the hurt heart. I never really imagined that people would actually keep up with this blog, much less enjoy and (sometimes) look forward to it. So if you’ve read this blog, if you’re reading it now, if you’ve ever said a kind word about it, baked something you saw here or simply clicked on something because you saw chocolate and like chocolate, THANK YOU. Thank you for encouraging me to stick with this tiny little blog, and thank you for putting up with me. I can’t tell you how fortunate I feel for all of the amazing people and experiences that have made their way into my life in the past 365 days. Some have been because of this blog, and some have not, but all have shown me how lucky I am to have you guys.

Now, I need to be honest with myself, and with all of you: I am not a good baker. Well, I’m ok. But I’m not a great baker. I know great bakers. They work at places like Butter Lane, or they’re college students named Rhea Mol (HI RHEA MOL!). I recently came to this realization after attempting to make Samoa bars. The Girl Scout treats are #2 on my list of “Cookies That I’ll Need When The World Goes Dark And Only Five People Are Left But The Other Four People Aren’t Into Cookies So My Cookie Stash Is Safe.” Rainbow cookies are #1. Mint chocolate chip cookies did not make the list, and never will, FYI.

Anyway, I think I screwed these bars up something fierce, but my boyfriend claims they are actually really good. That’s why he’s my boyfriend. Let me tell you what I did, and then let me tell you what you should not do.

Things That I Did That You Should Not Do (Unless You Want Sucky Bars)

1. I halved the recipe. You should not halve the recipe.

2. I used Werther’s Caramelts, which are not the same as regular caramels, and are actually not very good by themselves at all. You should not blahblahblah…

3. I did not melt enough caramels, but then again it’s not like I had the right caramels anyway so I was already screwed. So you know what you should not do, right?

Cool. Let’s get to the recipe.

Samoa Bars (makes 30 bars)

For the shortbread base:

1/2 cup of sugar

3/4 cup of softened butter

1 egg

1/2 tsp vanilla extract

2 cups of all-purpose flour

1/4 salt

For the coconut-caramel topping:

3 cups of shredded toasted coconut (toast in a 325º oven for 10 minutes until browned)

12 ounces of chewy caramels, but don’t get cute and try to get fancy ones that aren’t real caramels

1/4 teaspoon of salt

3 tablespoons of milk

10 ounces of semisweet chocolate (you can use chocolate chips)

Preheat your oven to 350°F.

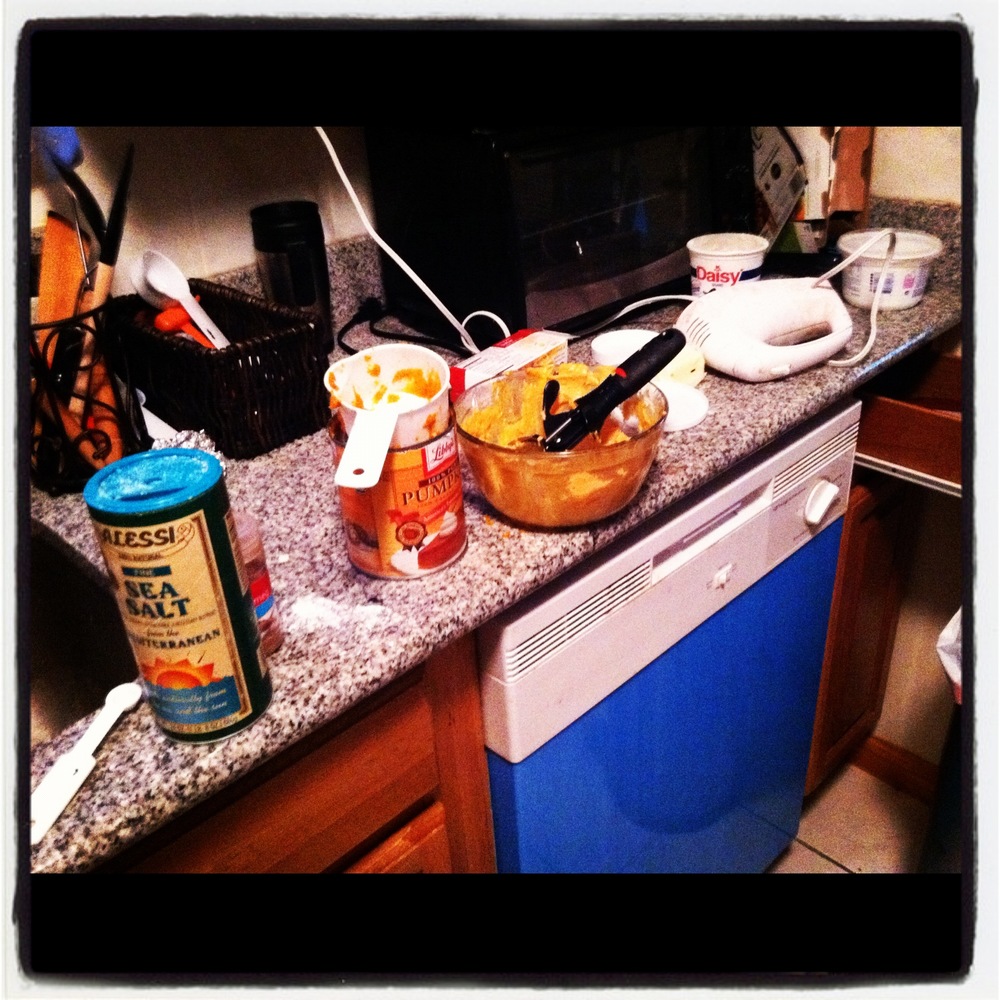
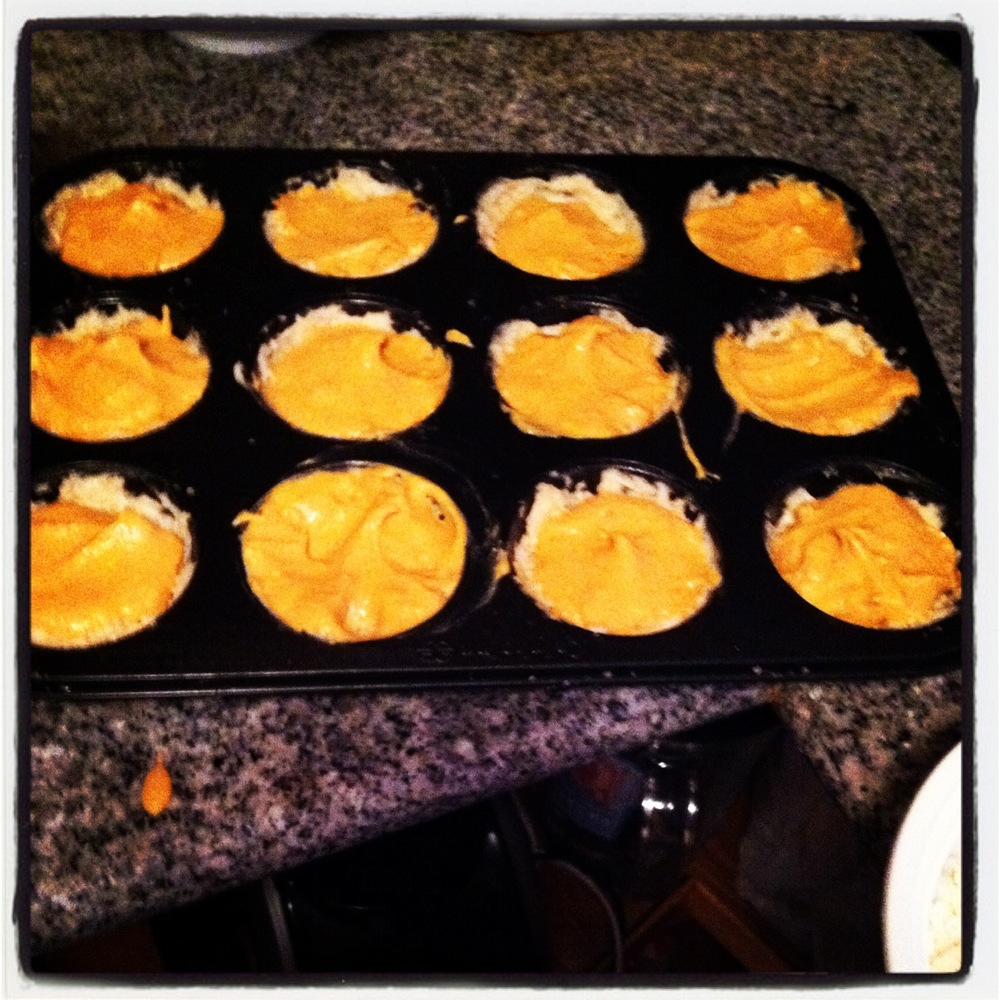
Let’s start with the base. Grease a 9×13″ pan. In a large bowl, cream together butter and sugar until fluffy. Add your egg and mix until fully combined (you may want a hand mixer for this), then stir in vanilla. Add flour and salt, a little at a time, until the mixture is crumbly and grainy. Pour into your pan and press evenly. Send into the oven for 20-25 minutes until the edges have been lightly browned. Let the base cool in the pan for ten minutes, then remove and let it cool completely on a wire rack.

To make the topping, place the UNWRAPPED caramels (I had to say it because you just never know) in a large saucepan over low heat. Add in your milk and salt, and stir until the mixture’s fully melted. Remove from heat and fold in toasted coconut. This will be a workout for your arms. I should know, as I am now ripped. Plunk large heaps of this caramel mixture onto your cookie base with a rubber spatula, then spread evenly until there’s a thick, gooey layer.

Grrr. No, this is NOT what melted caramel is supposed to look like.

Cut into 30 bars.

To melt your chocolate, place into a large bowl over another bowl of simmering water. Stir until completely melted. Dip the bottoms of your bars in the melted chocolate, then lay on parchment paper so the chocolate hardens. Then, using a spoon or a piping bag, drizzle more melted chocolate over the top.

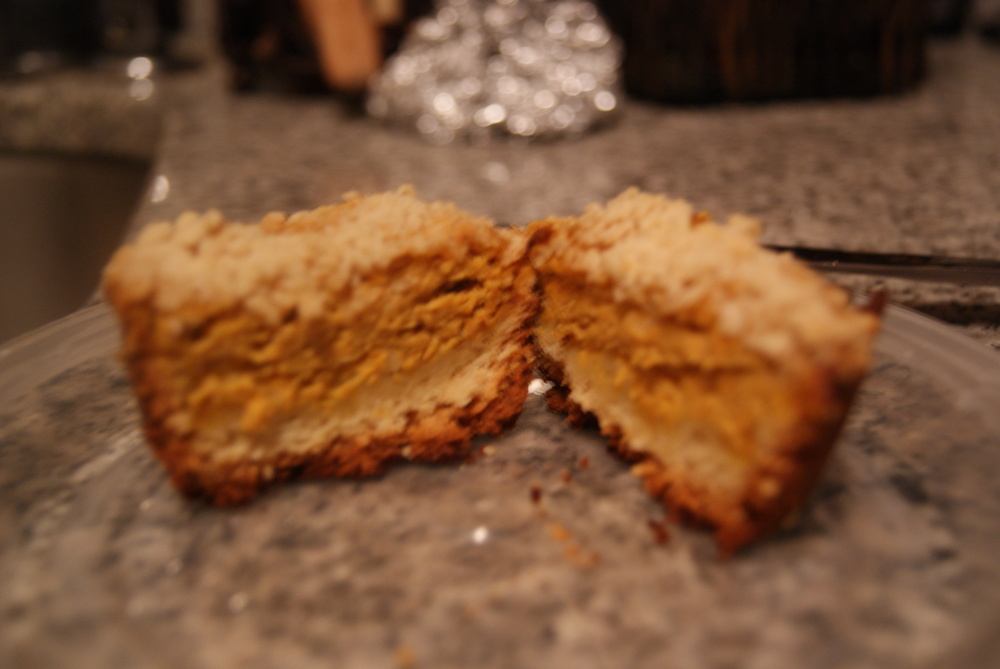
Ok, honestly, these weren’t terrible. But they’re not Samoas, mostly because I’m the opposite of a genius and can’t understand what caramel is, apparently. They were good, but not good enough to keep me from beating myself up over the fact that THEY’RE NOT SAMOAS.

The night after I made these, I decided to make a chocolate cake, to prove to myself that I actually could bake. Let me be honest though, I did not want to make this cake. I was so tired, frustrated and depressed due to some seriously crappy weather that I basically needed to force myself to start this thing. I was going to include that recipe here as well, but I’m thinking it deserves its own post, because it’s probably the most amazing cake I’ve ever made. It’s also, visually, perhaps the ugliest. Stay tuned?

So friends, here’s to another year of screwing up recipes and eating the crazy, crumbly, messy pieces of sweetness anyway. Stay classy. ❤

Categories
Breads Cakes

Let’s Talk About Another Holiday I Hate While Making Another Treat That You’ll Love

I made this egg-in-a-hole thing for breakfast this morning. It was supposed to be a lovey-dovey looking heart. Instead it looks like the cardiac muscle.

Happy Tuesday! Yes, that’s what I am calling today. I really don’t really enjoy this holiday. In the sixth grade, one boy asked another boy to ask me to be his Valentine. Then, my supposed Valentine never spoke to me again. It was not cool.

Actually, let’s be fair. I have never enjoyed this holiday…until now. I like who I’m with. I like him more than I dislike this holiday. I like him more than I hate Stamos. That’s a lot! Also, I’ve chosen to look at today as “Grateful For All Of The Stuff I Love Day.” So, to continue, I heart Sylvapotamus and The Swell Season and my family and this blog and baking andandand…

Enough cheese for you yet? No? Ok then. Let’s make Lemon Cream Cheese Coconut Bread. That should do it!

Lemon Cream Cheese Coconut Bread (makes one mother of a loaf)

For the bread

1 cup of sugar

1/2 cup of softened butter

2 eggs

1/2 cup of milk

3 tablespoons of lemon juice (about the juice of one lemon)

1 tablespoon of lemon zest (about the zest of one lemon…see how that all worked out?)

1 3/4 cups of all-purpose flour

1 teaspoon of baking powder

1/2 teaspoon of salt

For the filling

3/4 cup sweetened toasted coconut flakes (Lay these out on a baking sheet and toast in a 350ºF oven for 10 minutes. Boom. Toasted.)

3 ounces of softened cream cheese or Neufchâtel cheese

3 tablespoons of confectioner’s sugar

For the optional glaze that I could live without (and, in fact, did live without)

1/2 cup of powdered sugar

2 to 3 tablespoons of milk

Preheat your oven to 350ºF and grease up a 8×4″ loaf pan. Meanwhile, in a large bowl, using a hand mixer, beat together the butter, sugar and eggs at medium speed. When it’s creamy, beat in the milk, lemon juice and zest. Then stir in your flour, baking powder and salt until combined. I’d recommend stirring in the dry ingredients by hand, especially if you’re trying to surprise the person you’re making this for and that person happens to live with you. Your kitchen might look like that scene from Scarface if you attempt to use the mixer. You get me?

Lovely, lemony batter

Now, let’s work on the filling. Make sure to set aside about two tablespoons of the coconut, which will (spoiler alert) appear later in the story. Mix the rest of the coconut with the cream cheese and sugar until fully combined.

Sweet Ron Burgundy, it took everything in me not to eat this filling while making it.

Now, pour half of your lemon batter into your loaf pan. Evenly spoon the cream cheese mixture onto it, then pour the remaining batter over to cover. Let this bake in your oven for 50 to 55 minutes, until the top is a deep, golden brown. Let this one cool in the pan for about 10 minutes, then remove it and let it cool completely.

At this point, you can make the glaze if you want to. Since I was making this as part of a Happy Tuesday Ambush Breakfast, I thought the glaze would be overkill. I’d actually tried it and did not love it, so decided to simply sprinkle my reserved coconut atop the bread. Mother of Blog, I think I made the right move.

This thing is a MUST make again. We haven’t even come close to finishing it, and I’m already thinking of occasions on which I can make this again. Methinks a Happy Thursday is in order.

Categories
Cakes Chocolate Cheer Easy Baking Vegan Desserts

It’s Wiggity Wiggity Wacky Cake

One of the many ridiculous events of the past few weeks. Yes, it is a screen shot of a video that the boyfriend took of me driving a Uhaul. God I love technology.

You all have to deal with groan-inducing titles like this one because I have a case of the sniffles and can’t think clearly enough to come up with something awesome. Weeks of unpacking, cleaning, dusting and rolling around on not-quite-clean carpets in fits of delirium (this has not been an easy move) have finally taken their toll on my body. I would very much like to assume the fetal position and take a season-long nap on the couch, but I fear this will be frowned upon. Instead, I must soldier on, baking cookies and cakes to keep loved ones happy. Lord, am I brave.

I’m ill. Indulge me.

So, a couple years ago I found a recipe for something called a wacky cake. I felt a strange pull toward this cake, and can only assume its name and I have something in common. I’m not really sure why it’s called a wacky cake (it’s also known as a dump cake, but sometimes my brain is five years old and finds that name disgusting) but hey, let’s just go with it, man.

I decided to go with this particular cake as one of three desserts (and that’s me holding back, kids) that would be featured at our housewarming shindig for two reasons: 1. it’s easy and I needed something easy because I was pulling my hair out and slowly rocking back and forth while trying to figure out if I should roll clockwise or counterclockwise along the carpets, and 2. it’s vegan, and I know some awesome vegans. I also know some awesome non-vegans who had no idea that this sweet treat was animal byproduct-free.  Ha! How you like me now?

Oh, this cake is also very kid-friendly, as it contains both baking soda and vinegar, which, if you’ve ever done that 6th grade science project involving creating your own volcano (mine never worked!!! WHY?!), you know will fizz up and create some serious joy for very little money. And I am all about the cheap thrill. Wait…

Wacky Cake (makes one 9-inch round cake)

1 1/2 cups of all-purpose flour

1 cup of sugar

3 tablespoons of unsweetened cocoa

1 teaspoon of baking soda

1/2 teaspoon of salt

1 teaspoon of vinegar

1 teaspoon of vanilla

5 tablespoons of vegetable or olive oil

1 cup of cold water

3/4 cup of non-dairy semisweet chocolate chips, optional (I used the Trader Joe’s brand)

Oh, the other great thing about this cake is that it’s made it one bowl. Easy clean-up! Yay! Anyway, preheat your oven to 350°F.

In a large bowl, sift together flour, sugar, cocoa, baking soda and salt. Then, dig two small wells and one larger well in the dry mixture. Pour vinegar in the first, vanilla in the second, and your oil in the third.

It looks like a panda! Not really.

Then, pour cold water over the mixture, stir, and watch it fizz! Mix together until all ingredients are completely combined, then add in about 1/4 cup of your chocolate chips, if you plan on using them, and stir.

Send this into the oven for 25 to 30 minutes, until a toothpick comes out with some crumbs stuck to it and the cake springs back a little when you touch it. Let it cool in the pan for ten minutes, then flip onto a separate plate and let it cool completely.

If you decide to make the chocolate topping (DO IT!), set the remaining 1/2 cup of chocolate chips in a medium-sized bowl over a pan of very hot water. Stir until totally melted, then pour evenly over the top of your cake. It should take about 45 minutes to cool and completely harden. Oh, I also tried to get fancy with it and make a little powdered sugar elephant stencil on top. You can see for yourself how that worked out below. Spoiler alert: it looks dumb…

…But it tastes amazing!

Categories
Cakes Cupcakes

I’m Baking Coconut Cakes, and I’m Baking Them Indian Style.

That’s because I have no counter space and have to sit on the floor. Ba dum bum.

Still there? Cool. So, the new kitchen is taking some getting used to. I have no counter space. That is not an exaggeration. In my old apartment, if I needed to reach something on the top shelf of a cabinet, I’d climb onto a tabletop and grab my prize. Here, I would have to find a way to straddle the stove in order to reach anything up high. If you know me, you know I will not be able to find a way that does not involve burning my lower half somehow. So, if you happen to see a recipe for a Brown Bottom Roast in the next couple of weeks, you’ll know why. You’ll also know not to make that particular dish yourself.

So even though I’ve been spending quite a bit of time getting to know my kitchen floor a little better, baking in the new place has been fun. My boyfriend painted the space a really pretty colonial blue– it was piss yellow before (I’m convinced that if you walk into Benjamin Moore and ask for the color “piss yellow,” they will hand you a bucket of the repulsive grime that coated our walls, even though they should probably just flush it all to hell)– so now sometimes I even bake when I’m not sad! What?!*

Anyway, this past weekend, we had a housewarming party that God decided to decorate with the first real snow of the winter. That meant that we were frantically running around in slippery, sleet-y weather getting together last-minute necessities. It also meant that one of us slipped and fell on her brown bottom [roast] and cursed the gallon of milk that anchored her to the ground for a good couple of minutes. Then she went home, cried, shook and churned out some mini coconut cakes for the party. Then they both got ready, ate cheese, drank wine, and partied, and everyone lived happily ever after forever. The End. Let’s do this!

Mini Coconut Cakes (makes 24 individual cakes, or an 8-inch round cake if you prefer)

3/4 cup of sugar

1/2 cup of all-purpose flour

1 1/2 cups of dried coconut (you can use sweetened or unsweetened, but I used sweetened because I had a ton left over from my fat bunny cake, and because it’s yummy)

4 large egg whites

Pinch of salt

1 stick (8 tablespoons) of melted and slightly cooled butter

2 tablespoons of finely grated lemon zest

2 tablespoons of sweetened dried coconut for sprinkling over the batter

Preheat your oven to 375ºF, and grease a 24-cup mini muffin tin. Meanwhile, in a medium-sized bowl, combine sugar, flour and coconut, then set aside. In a separate large bowl, whisk together egg whites and salt until smooth, then add in butter and lemon zest and stir until fully combined. Add dry ingredients into the bowl of wet ingredients, a little at a time, until fully incorporated. The mix should look a little lumpy and soggy, which is exactly what you want anything you make to look like:

Using a teaspoon, spread batter evenly among muffin tins, and then send this into the oven until the tops are deeply golden, which should take about 15 minutes. I’d also rotate the pan about halfway through cooking, unless you want some uneven toasting, like this:

Guess what I didn't do! Guess!

Turn these out onto a rack and let them cool completely before enjoying. Seriously, they’re much better when they’ve cooled, mostly because your tongue’s not burnt. Once cooled, these were a pretty big hit. This was actually the second batch that I’d made in two days, because a good portion of the first batch had mysteriously vanished from the kitchen. Methinks the new walls have a healthy appetite for coconut…

*Not to worry, I’m still a grump. I still give rude commuters dirty looks, and I still hate Christmas. Some things will never change. Like the name of this blog, no matter how pretty our kitchen is now (sigh, it’s so pretty…). Pinky promise.

Categories
Cakes Holiday desserts Muffins

It’s Thanksgiving, So We’re Talking About Stuffing [One Dessert Into Another]

Guess what I did on Monday! I went to see Chris Cornell perform at Carnegie Hall! Guess how terrible my seats were! THIS terrible (my arms are stretched WAY out)!

photo(4)
photo(4)

And yet, the show was pretty perfect. I’m happy I decided to go instead of scamming someone else into buying my nosebleed, second-to-last row seats. That man has got a VOICE, and that voice has got some power. He’s also got some serious Soundgarden fans: on the long elevator ride up to our seats, my show companion observed several long-haired devotees packed into our car and stage-whispered “take me to 1994!” Yes, I did lose it. And no, I obviously did not make friends at this show. Still, in the spirit of a holiday that’s supposed to be about being happy and grateful, I thought I’d start with a night that actually made me feel those things. Especially since I’ve been such a lame downer lately. Let me make that up to you with more sweets, dear people.

As you guys probably know by now, I like stuffing awesome things into other awesome things to create super desserts. I mean, why have one tasty, amazing and butter-filled concoction when you can have two? And why have them separately when you can just smush them together? Aren’t you always so bummed when you only have room on your plate for a few desserts, so you have to start piling cookies on top of pie slices on top of puddings? I know you all do that too, so don’t even play.

Enter the Pumpkin Pie Coffee Cake. Yes, kids, it’s for real and it’s fabulous. It’s also not healthy at all, so if you’re looking for something pumpkin-y that’s low-sugar and low-fat (Mom and Dad), feast your eyes on my previous post on doughnuts. For the rest of us champions, there exists this glorious, fat-laden monstrosity that deserves a spot on your Thanksgiving treat table. It also just deserves a spot in any other void in your life. What I’m saying is that this cake will solve all your problems. Trust me, I’m a Reverend.*

I turned these into muffins because I’m an evil human being intent on giving these away to unsuspecting friends and family, and muffins make this so much easier. If you would rather make this as a cake, you can use a 10″ spring form pan for easy removal.

photo(3)
photo(3)

Pumpkin Pie Coffee Cake Muffins (makes 18 muffins)

For the coffee cake

2 1/4 cups of all-purpose flour

3/4 cup of sugar

1/2 teaspoon of baking soda

1/2 teaspoon of baking powder

1/2 teaspoon of salt

3/4 cup of butter, cold and cut into cubes

1 egg

3/4 cup of sour cream

1 teaspoon of vanilla extract

For the filling

8 ounces of cream cheese or neufchatel cheese

2 cups of canned pumpkin (again, NOT pumpkin pie filling, that ain’t right)

1/4 cup of sugar

1 teaspoon of cinnamon

1/4 teaspoon of nutmeg

1/2 teaspoon of ground cloves

Pinch of salt

Preheat your oven to 350°F. Let’s start with the coffee cake portion of this death trap. In a large bowl, sift together flour, sugar, baking soda, baking powder and salt. Throw in your cubed butter and start mixing with clean fingers until it’s formed into little lumpy balls. This might take you a while, and it might feel a little like that pottery scene from Ghost. Don’t go there, though. Instead, set aside 3/4 cup of this mixture for the topping.

photo
photo

In a separate bowl, mix together the sour cream, egg and vanilla, then stir into your flour mixture to create a loose dough (don’t overmix). For muffins, mold these into the bottoms and 1 inch up the sides of your tins. It might take a while because the dough gets sticky, so pace yourself.

Then, in a medium-sized bowl using a hand mixer, mix together your cream cheese, pumpkin, sugar, spices and salt until smooth. Pour the mixture evenly into your muffin cups, over the coffee cake dough.

photo(1)
photo(1)

Sprinkle the crumb topping you’d reserved over each cup, making sure to evenly cover them as best you can. Then send the pans into the oven for 55 to 60 minutes, rotating pans halfway through for even baking, until the sides are lightly browned.

SONY DSC
SONY DSC

Mine came out a little more than lightly browned, because I didn’t check on them at 55 minutes. Don’t be like me. These were still pretty amazing, though, based on all of the “taste-testing” I did. I also gifted one to my coworker and friend, Afshan, and stood behind her going “bite into it! Bite into it” while she picked it up (I realize how creepy that is now, but did not at the time. My bad, friend). She gave it a thumbs-up too, even though I am a creeper.

Anyway, since it’s Thanksgiving and one of the only times of the year I grow a soul, I’d like to just take a minute to let you people know how grateful I am that you actually read this thing. It’s funny and touching to hear someone say “I read about it on your blog,” because I’m still sometimes convinced that I’m the only person who sees it. So thanks for making this even more fun than I thought it would be when I started causing trouble in the blogosphere earlier this year. Have a Happy Thanksgiving. We’ll be back to our regular soulless, untouchy, unfeely programming shortly.

*Obviously I am joking yet again. Just because I’m a minister doesn’t make anything I say gospel (har har). Except that this dessert is amazing. That’s for real.