FRIENDS!
How was your Thanksgiving? Seriously, tell me. As you all [hopefully] know by now, Thanksgiving is, according to yours truly, the best holiday there could possibly be. There is food and booze (uh, where I come from at least…) and desserts and, most importantly of all, the people you love and lurrrrve for whom to be especially grateful. I love it.
So, this year, we went to my parents’ house and insisted on doing almost all of the work. My dad handled the turkey, mostly because a 15-pound bird would be screwed in my care. More importantly, the people who would be consuming that 15-pound bird would be screwed in my care. It’s just not my thing.
Know what is my thing? Fresh baked bread, three-cheese macaroni and cheese, fresh cranberry sauce, roasted brussels sprouts, and three pies. (I only kept it to three desserts since there were six of us and I had to make some savory dishes as well 😉 ) Boyfriend made the most amazing mashed potatoes, and Sylvapotamus killed it with homemade stuffing and some chocolate mousse that I did very bad things to (more on that later).

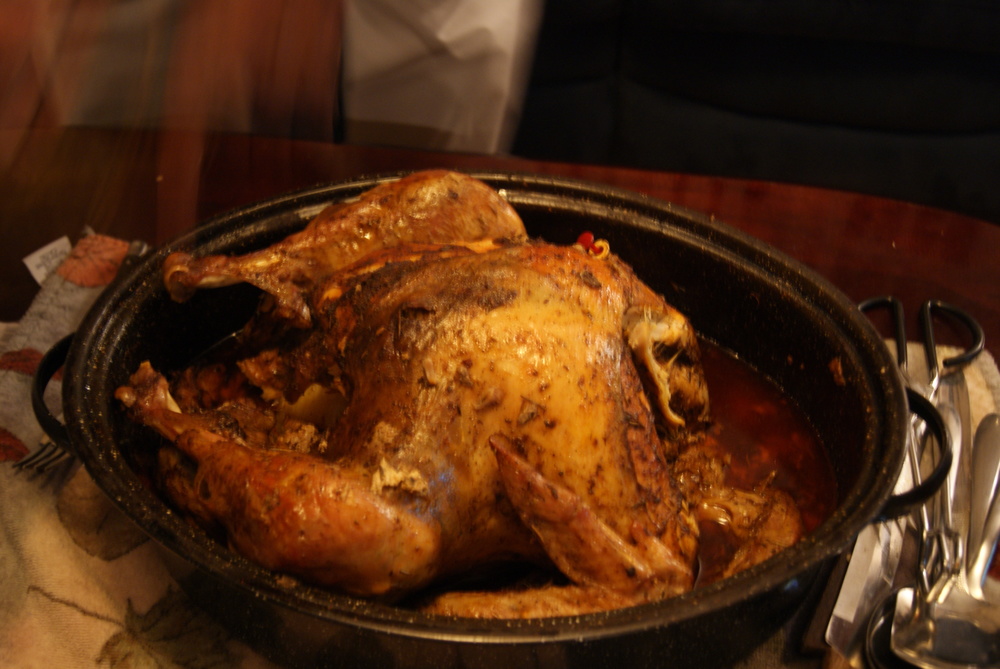
Take a look at that bird! Gorgeous, right? Ahhhhh….
So, anyway, it has been quite an interesting year. It’s been both trying and wonderful, stressful and blissful. I’m honestly kind of shocked by how different things are from the way they were last year. And by different, I mean better. I’ve got a lovely, handsome gentleman to share a couch (and a kitchen, and a hamper, and, well, a home) with, and I have parents and sisters who’ve welcomed him with open arms and three fingers of Johnnie Walker Black (nice job, Dad). Certainly, life is far from perfect and there is a LOT of work to be done in many aspects of my life. But I’m grateful to have the time to do it, and I’m really fortunate to have the company I have while I do it.
Well, that’s enough of that sap. Geez. Who invited the mushball to this sad-fest? Let’s move on to my favorite part of all of this: DESSERT!
Now, I need to confess something that is incredibly embarrassing for me: I cannot freaking make a freaking pie crust. I have freaking tried so many freaking times and every time my freaking pie crust sucks. Many recipes call for a food processor, which I am too boogie-down-broke to have right now, but I can’t even seem to follow the ones that don’t call for one. I mean, I’ve watched Youtube tutorials and consulted cookbooks and food blog forums, and I just have not gotten down the freaking process. I am so angry about this that I spent time debating whether or not to bust out ANOTHER f-word, but then I decided to keep this post a family show. How lucky are YOU?
So, yeah, there’s that. If you’re making a pie crust from scratch, please consult some other, better resources. I’d provide you with some but I’m not going to help you fail. :(. Anyway, I used frozen ready-made pie crusts. Now, these do not suck, but as many of you know, I hate the idea of not making all dessert components from scratch. But, after many tries and many sticks of butter wasted (R.I.P. hopes and dreams), I decided I had to go with the store-bought stuff, since pies are pretty much mandatory at Thanksgiving dinner.
Now, which pies, you wonder? I went with pumpkin, pecan and chocolate meringue. All three were deemed “must-haves” by various sweet-toothed guests. Since I used a pretty standard recipe for the pumpkin pie (the one found on the Libby’s Canned Pumpkin label), I’m only going to get into the latter two pies. Let’s start with the pecan!
Pecan Pie (makes one 9″ pie)
1 9-inch unbaked pie crust of your choice 😦
2 cups of coarsely chopped pecans + a few whole pecans for the top if you’d like to get fancy up in this pie
2 eggs
1/2 cup of light corn syrup
3/4 cup of brown sugar
1 tablespoon of molasses (if you’d like something milder, I would suggest pure maple syrup)
2 tablespoons of melted butter
2 tablespoons of flour
1/4 teaspoon of salt
1 teaspoon of vanilla
Preheat your oven to 375ºF. Distribute your chopped pecans evenly along the bottom of your crust. Mix the remaining ingredients and then pour them over the nuts (pecans will rise to the top of the crust at this point).

Top with whole pecans if you please.
Bake for 40-45 minutes, or until the filling is set. If you’re worried about the crust burning, you can create a pie shield (basically a foil ring cut to cover the pie crust) and place it on top of the crust about halfway through baking. Once the pie’s done, remove from the oven and allow to cool on the counter completely.
Now, on to the next pie (don’t worry…the pictures are coming 😉 ). Now, the chocolate meringue is something I’m very fond of, mostly because it was one of the first successful desserts I ever made. Heart you.
Chocolate Meringue Pie(makes one 9-inch pie)
1 9-inch baked pie crust of your choice 😦
For the filling
3 egg yolks
1 cup of granulated sugar
3 tablespoons of flour
4 tablespoons of cocoa powder
1/8 teaspoon of salt
2 cups of milk (I used skim)
1 tablespoon of butter
1/2 teaspoon of vanilla
For the meringue
3 egg whites
1/8 teaspoon of salt
1/3 cup of granulated sugar
Preheat your oven to 400°F. In a medium-sized saucepan, stir together egg yolks, sugar, flour, cocoa and salt. Whisk in milk, and cook over medium heat. Stir constantly until the mixture comes to a full boil.
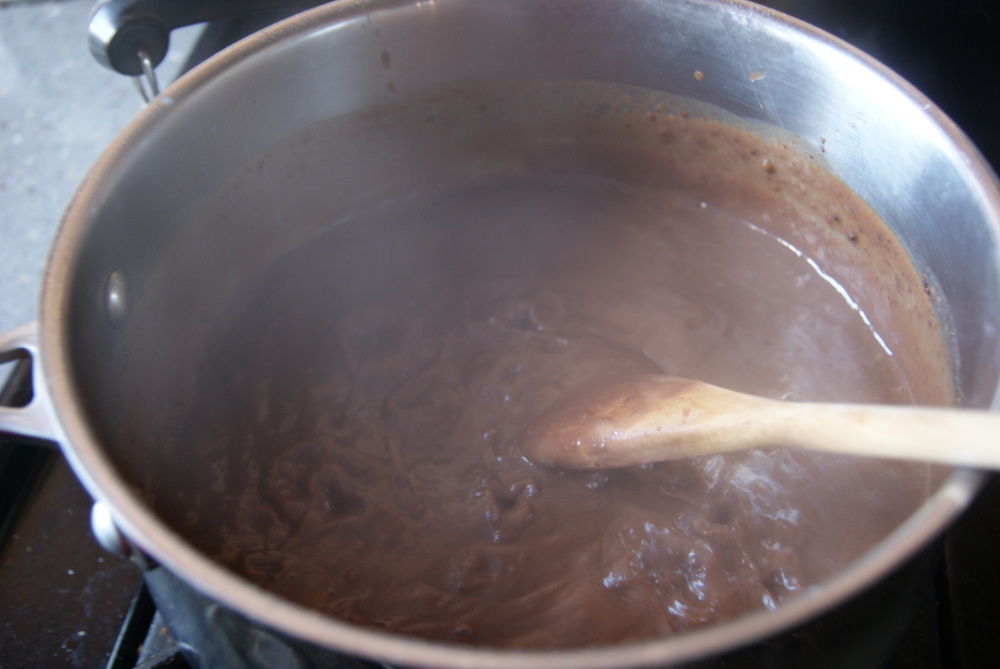
Remove from heat, stir in your butter and vanilla, and then pour into pie shell.
Now, let’s make our meringue. So, it’s really important, when beating egg whites, to work with an absolutely spotless bowl, and clean whisks. There shouldn’t be any moisture or bits of batter kicking around, or else you won’t have the stiff peaks a meringue needs. To start, using a stand or hand mixer on high, beat egg whites and salt together until foamy.
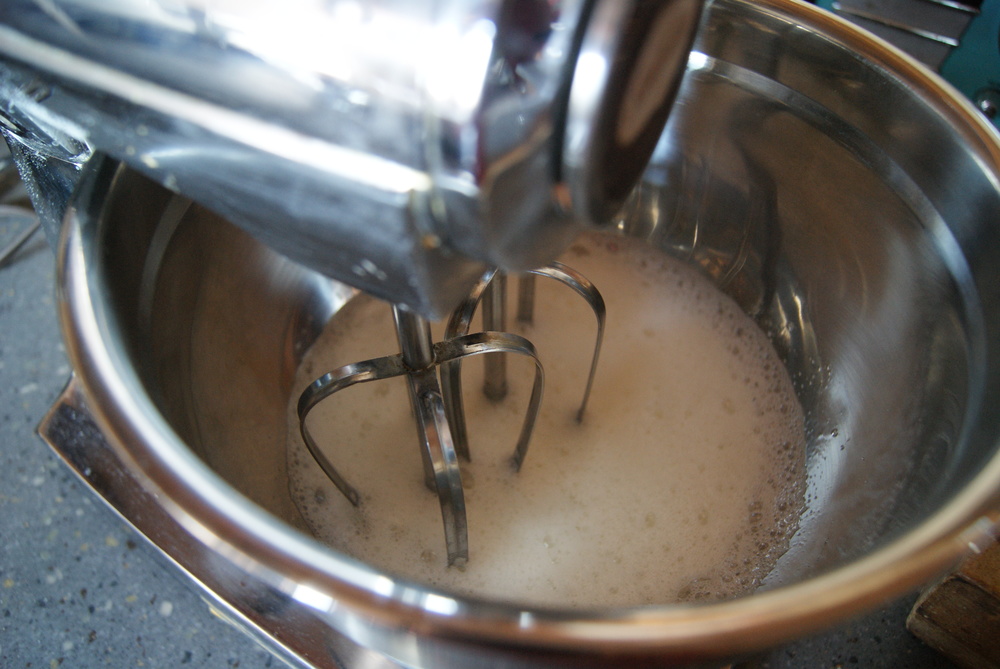
Gradually add in your sugar while mixer is on, and continue to beat until stiff peaks form. This may take a little while, so just be patient.
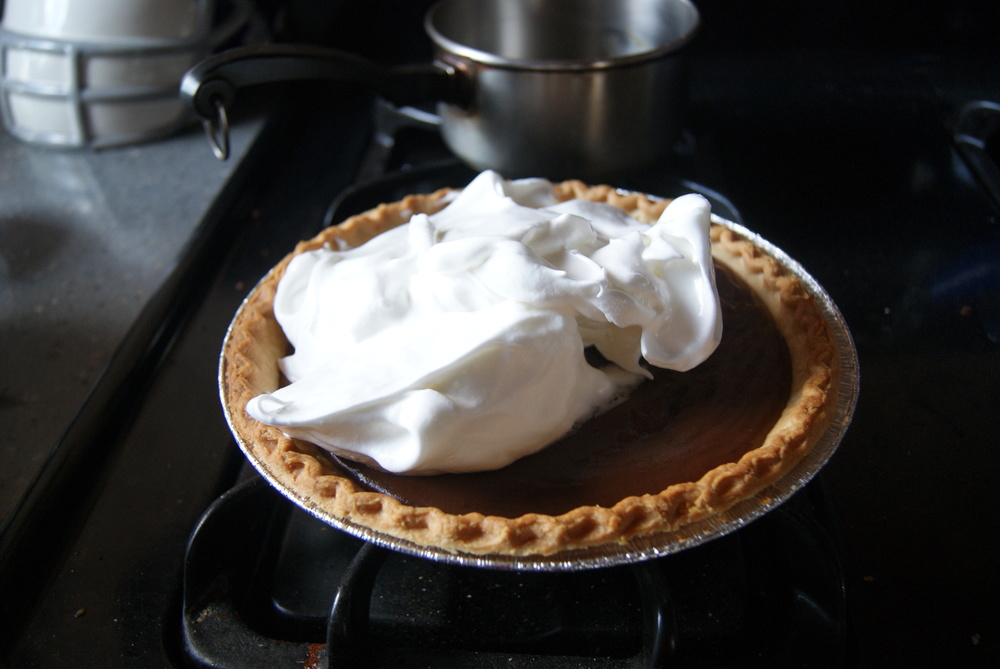
Once done, spread meringue evenly on top of custard, making sure to spread so that the chocolate isn’t visible. Obviously I took the above picture before I finished spreading. Anyway, bake for 10-12 minutes, until the meringue is lightly browned.
So, how did it all turn out?

Pretty well, if I do say so myself. Boyfriend was partial to the pecan, which I was not as crazy about (I guess pecan’s just too sweet for my blood), and I was all about the chocolate meringue. I was also really into Sylvapotamus’s chocolate mousse, to the point where when I accidentally knocked the entire bowl of it over (and broke the bowl) I was still trying to figure out ways to eat it off of the floor. I am sorry Sylvapotamus. 😦
So, that was my Turkey day. And I miss it already.


")


