*Today’s post is going to be focused on the dessert and will contain little to no complaining on my part, just to see what being a primarily baked good-centered blog feels like.*
http://www.youtube.com/watch?v=VRhHwHHKBss
So, how do you all feel about Mallomars?
I have no idea if those of you not in the Northeast are privy to the awesome power of the Mallomar. Last I heard, it was an East Coast thang.
I am unsure of my feelings on them.
So unsure that I had to go through several boxes of the seasonal treat this past winter to determine my feelings on them.
So unsure that I attempted to store three boxes away in my freezer so that I could continue to test them during the off-season. (Note: the aforementioned boxes have since mysteriously disappeared)
So unsure that when I realized my reserve boxes had gone missing (Ed note: contents of box were later determined to have been consumed by one James Hilger. Mr. Hilger resides with the author, and will pay dearly for his mistake) I furiously hunted down a homemade recipe for the treat, and vowed to make them as a summertime treat. In your sugar-coated face, archaic Nabisco rules!
If you want the truth, I actually respect Nabisco for attempting to limit my intake of this marshmallowy, chocolate-covered delight on a graham cracker platform. It’s a pretty good marketing strategy, considering the number of salivating Mallomar-devotees lurking outside of my– let’s face it, everyone’s– local Key Food come wintertime. But I just can’t live without ’em. I… I can’t. And so I attempted to make my own. Let’s do this, friends.
Homemade Mallobars (they’re bars because I cut them into bars, because I did. These made about 40 for me)
From the James Beard Foundation
For the Graham Crackers
1/2 cup plus 2 tablespoons of all-purpose flour
1/2 cup plus 2 tablespoons of whole wheat flour (also called graham flour)
Pinch of salt
1/4 teaspoon of baking soda
6 tablespoons of softened butter
2 tablespoons plus 1 1/2 teaspoons of white sugar
2 tablespoons of brown sugar
5 teaspoons of honey
1 egg, beaten
1/2 teaspoon of vanilla extract
For the Marshmallow
1/3 cup of water, plus extra for cooking
1/2 teaspoon of vanilla extract
2 envelopes of plain gelatin
1 cup of white sugar
1/2 cup of light corn syrup
For the chocolate coating
1 1/2 cups of dark chocolate, chopped
We begin with our graham crackers. Now, if I were you, I’d start making these at least a day in advance of when you’d like to enjoy them, mostly because the graham crackers require a fair amount of chilling before being baked. Trust me, these will be well worth the wait.
In a large bowl, whisk together your flours, salt and baking soda. In a separate bowl, cream together butter and sugar until combined, then add in honey. Mix in the egg and vanilla until fully incorporated. Combine with dry ingredients and mix just until batter forms. Cover bowl and chill dough for at least two hours.
Remove dough from bowl and place between two large sheets of parchment paper. Roll out into a 1/8 inch thick sheet. Transfer flattened dough to a baking sheet and refrigerate again for at least an hour, or overnight.
When ready to bake, preheat oven to 325ºF. Carefully remove parchment sheet on top of dough. From here, you can either cut rectangles/squares of dough or bake as an uncut sheet, which is what I did. Transfer to parchment-lined baking sheets and bake for 14 minutes, rotating sheet halfway through baking. Remove from oven and let crackers cool completely.
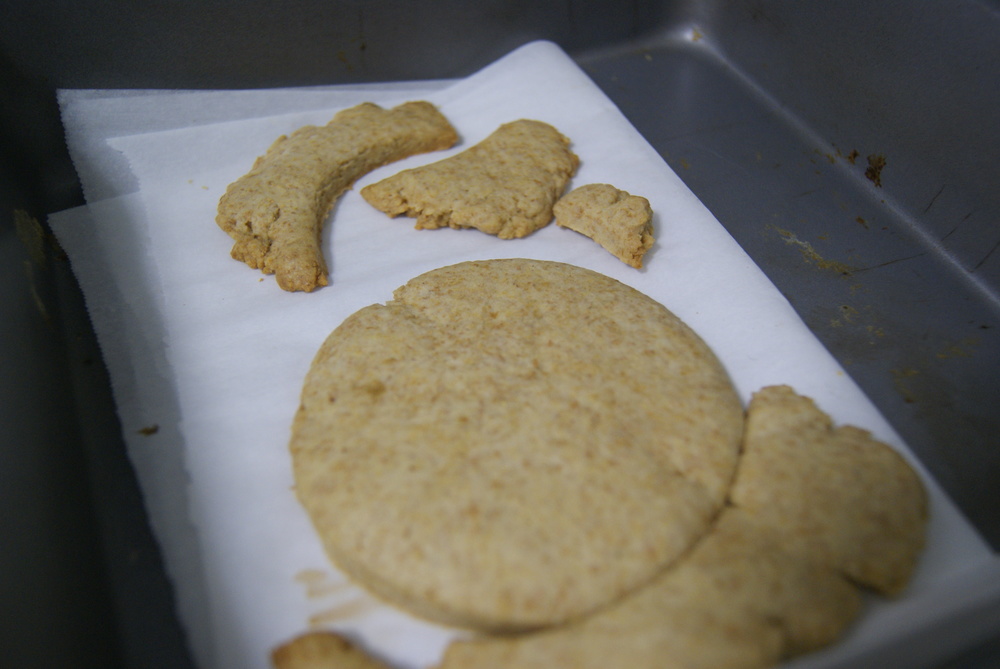
So…. I decided to taste-test these before continuing on in my mission, mostly because I don’t know that I’ve ever eaten a homemade graham cracker. And I am now sorry that I have spent so much of my life on the store-bought stuff. The homemade ones were soft, sweet and had a deep, almost nutty flavor to them. I hope I never again let my laziness get the better of me by going with the pre-made stuff.
And now, on to the marshmallows. We’ve made marshmallows here before, and this won’t really be any different, but I’ll take you through the steps again so you won’t have to click back and forth.
To make your marshmallows, combine water and vanilla in a small bowl. Sprinkle gelatin evenly over water and set aside for at least 10 minutes. In a separate saucepan, mix together sugar and corn syrup. Pour in just enough water to make the mixture resemble wet sand. Bring mixture to a boil, then lower heat to medium. Cook until the mixture reaches 260ºF (note: if you don’t have a candy thermometer, you can cook until the mixture reaches “soft ball stage.” Place a tiny amount of mixture in a bowl of cold water– if it becomes a soft ball, the mixture is ready to be taken off the heat), then remove from heat. Carefully stir water/gelatin mixture in, and stir until dissolved.
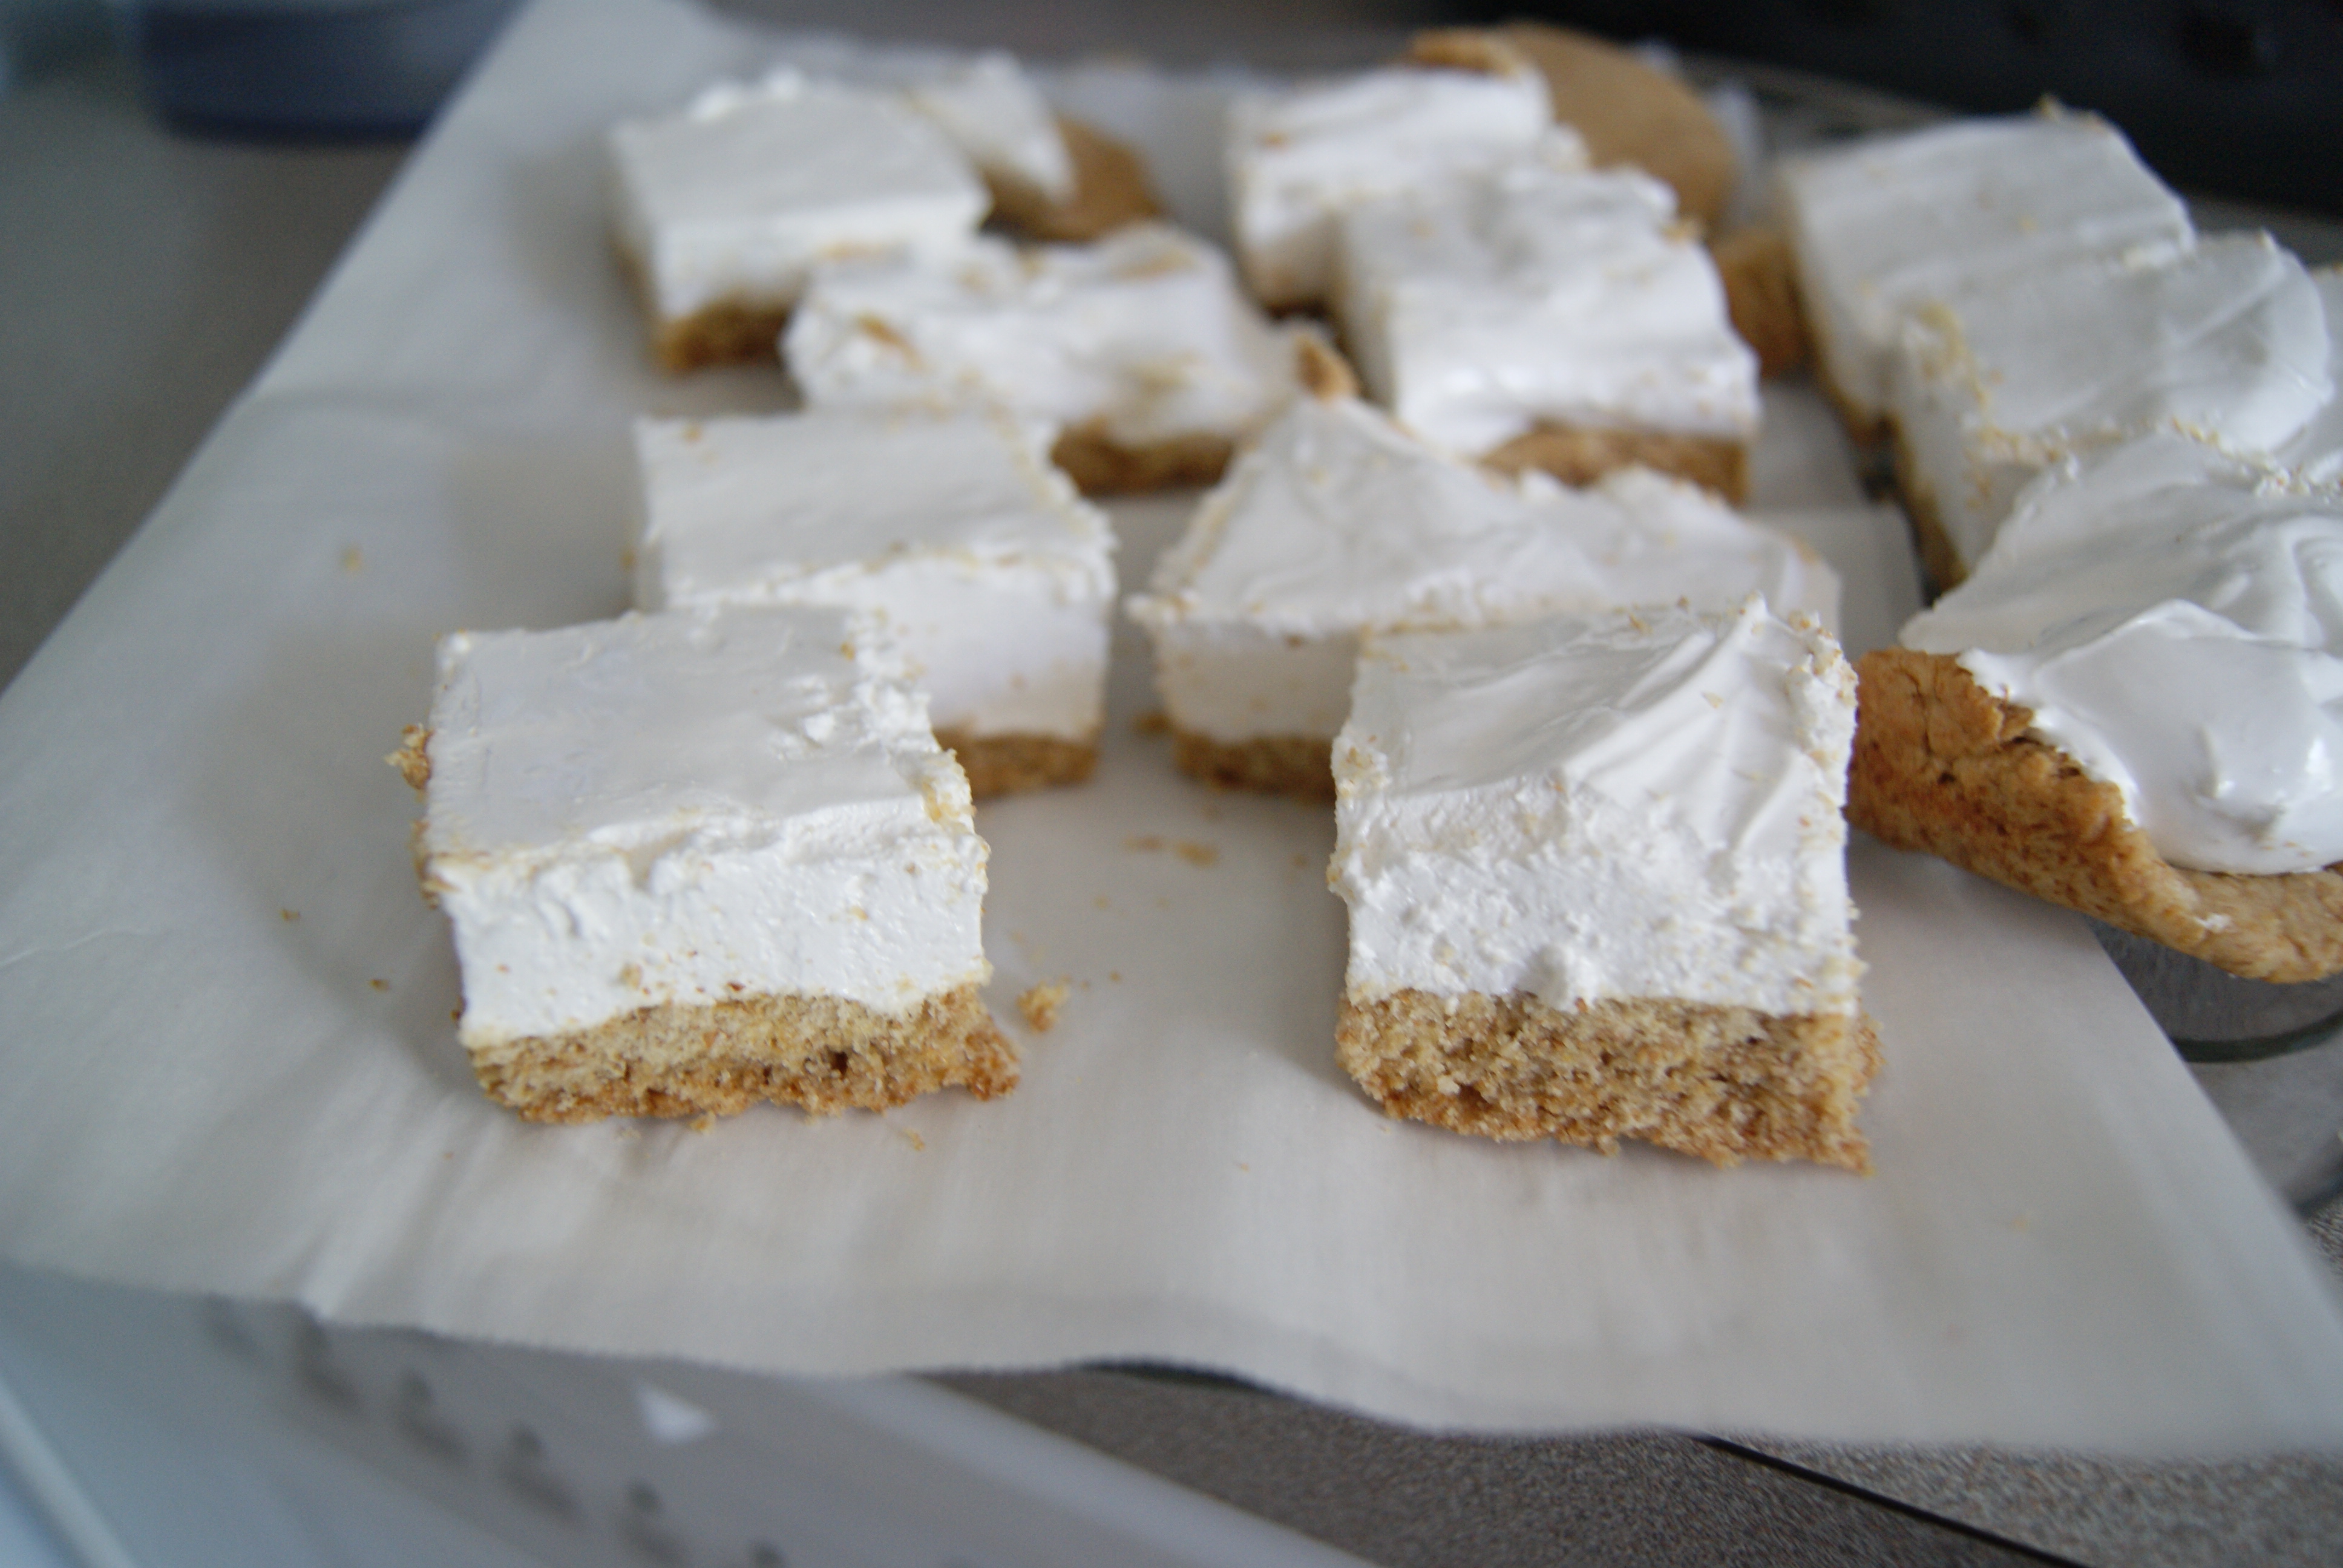
Transfer mixture to a stand mixer and whisk on high speed, taking care that mixture doesn’t splatter. Mix until thickened as much as possible, about 7 minutes. Next, you can either fill a pastry bag with marshmallow mixture or use a rubber spatula to spread mixture directly onto graham crackers. Gently smooth the top of mixture with wet fingers. Let firm and cool completely. At this point, if you haven’t already, you may cut into squares/something that vaguely resembles squares/amoebas/anything you want.

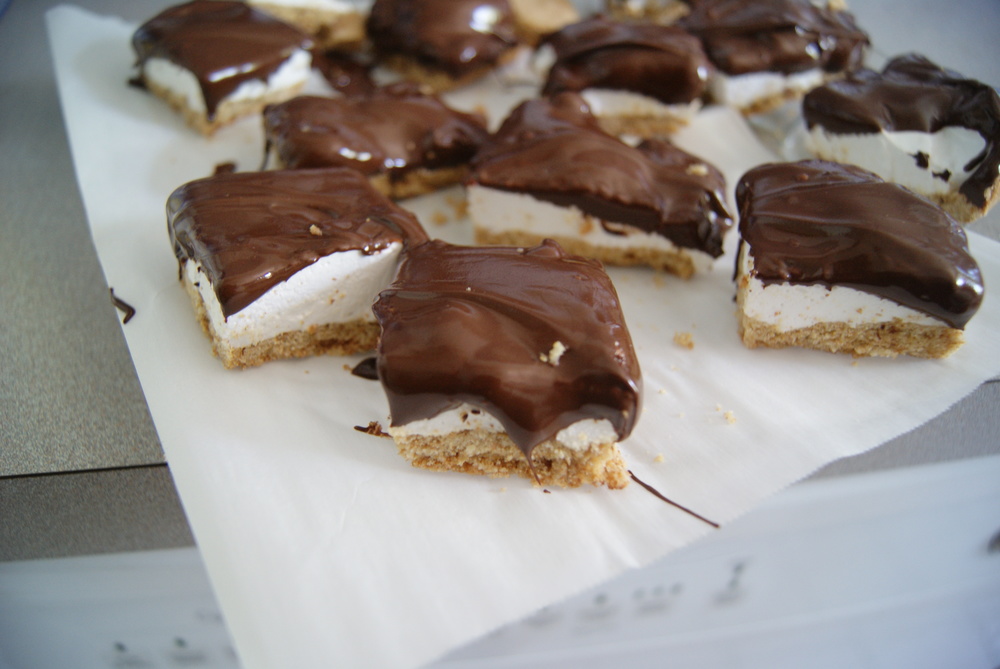
When cooled, melt your chocolate (either in microwave or in a double-boiler), then pour chocolate over. Let chocolate harden, and serve.

Words of warning: you will probably not be able to wait until these things are even close to not-still-hot before reaching for them. If you are, kudos, but if not, you were warned, genius. My fingers are still medium-rare from that mistake. Seriously, let these cool…
… Because once you do you will be left with magic. To be honest, they tasted more like s’mores than Mallomars, but I didn’t really care, because they were ridiculous. Also, I discovered that they are somehow even more amazing once frozen. O.M.G. DO THIS. With Independence Day approaching, I cannot think of a better way to salute ‘Murica than this magic.